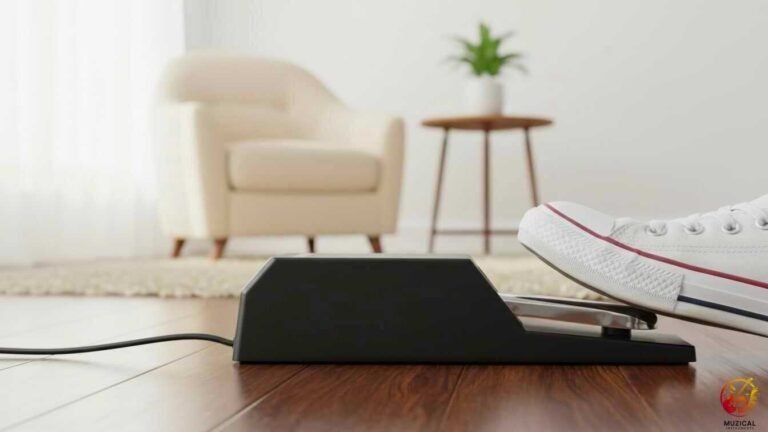
Beginner’s Guide to Piano Pedal Maintenance and Cleaning
Piano pedal maintenance is one of those things most beginners overlook. Yet, when a pedal starts to squeak or stick, it can make every note feel wrong. A dirty or stiff pedal doesn’t just ruin your sound, it can slowly wear out your piano too. With a little care, you can keep pedals smooth, quiet, and responsive.
In this guide, you’ll learn how to clean, maintain, and fix common pedal problems step by step.
What Do the Three Piano Pedals Actually Do?
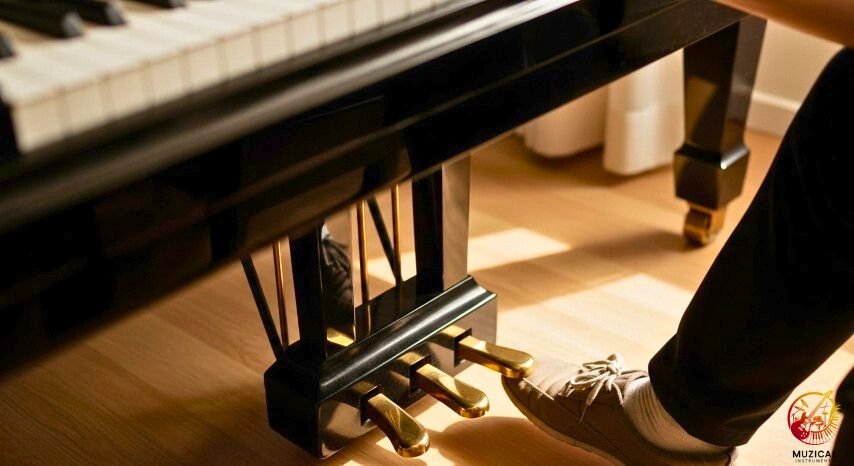
Here’s what your three piano pedals do. They are connected to the piano’s internal mechanism (the action) by a system of levers and rods called the trapwork.
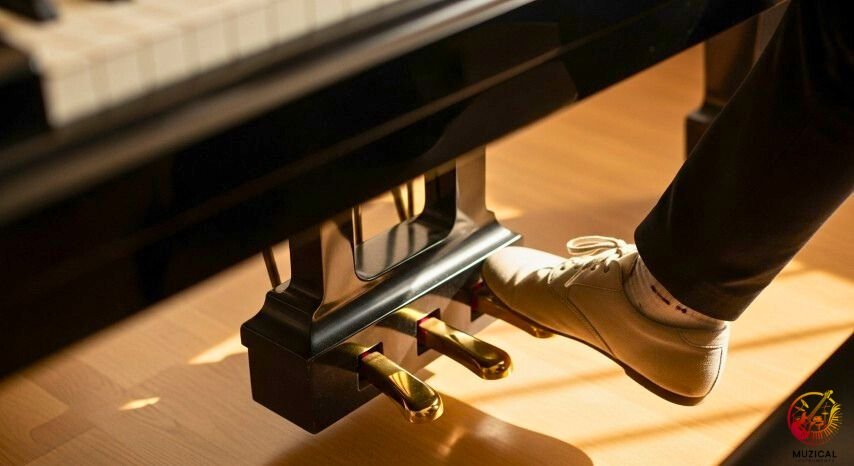
The Damper Pedal (Right)
Most people call this the sustain pedal. When you press it, a mechanism lifts all the felt dampers off the strings at once. This allows any notes you play to ring out, or “sustain,” even after you lift your fingers. It’s essential for creating a rich, connected sound.
The Sostenuto Pedal (Middle)
On most grand pianos and some high end uprights, this is a true sostenuto pedal. It’s a selective sustain, it only holds the notes whose keys are already pressed down when you engage the pedal. This lets you sustain a bass chord, for example, while playing short, crisp notes over it.
On most upright pianos, this is not a sostenuto. It’s a “practice pedal” or “celeste pedal” that drops a piece of felt between the hammers and strings to make the piano much quieter.
The Una Corda Pedal (Left)
This is the soft pedal, or una corda pedal. It changes the tonal color and reduces volume. Its mechanism differs by piano type:
- On a Grand Piano: It physically shifts the entire keyboard and action to the right, so the hammers strike only two of the three strings for each note. This creates a genuinely softer, more delicate tone.
- On an Upright Piano: It moves the hammers closer to the strings. This lessens the impact force, making the sound quieter but without the distinct tonal change of a grand.
How Do You Clean and Polish Piano Pedals?
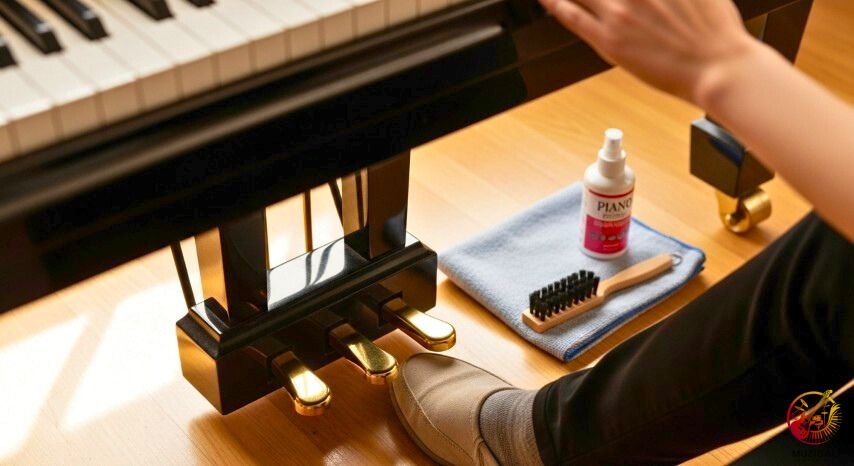
This is the easiest part of piano pedal care and the best place for a beginner to start. Grimy, tarnished pedals don’t just look bad; they can feel unpleasant underfoot. Let’s make them shine. Think of this as a 15-minute job that makes your entire instrument look better.
Step 1: Gather Your Cleaning Supplies
You don’t need much. Forget harsh chemicals or all purpose sprays.
- Two Microfiber Cloths: One for applying polish, one for buffing.
- A Quality Metal Polish: For solid brass pedals, a product like Brasso works well. If you’re unsure if your pedals are solid brass or just plated, start with a gentler, non abrasive metal polish.
- Painter’s Tape: This is non negotiable. You must protect the wood around the pedals.
- A Soft Brush: An old toothbrush or a small paintbrush is perfect for getting dust out of crevices.
Step 2: Prepare the Area
Spilling polish on your piano’s wood finish can cause permanent damage. Take your painter’s tape and carefully mask off the entire wooden area surrounding the pedals. Cover the case and the lyre (the harp shaped structure holding the pedals on a grand piano). Take your time here an extra minute of taping saves a world of regret.
Step 3: The Polishing Process
This is where the magic happens.
- Dust First: Use your soft brush to gently whisk away any dust or “dust bunnies” from around the pedal and where it enters the case.
- Apply Polish to the Cloth: Never, ever apply polish directly to the pedal. Put a small, pea sized amount onto your first microfiber cloth.
- Rub Gently: Work in small, circular motions, focusing on one pedal at a time. You’ll see the tarnish start to lift onto the cloth. Don’t use excessive force.
- Buff to a Shine: Before the polish dries completely, take your second, clean microfiber cloth and buff the pedal vigorously. The shine should come right back.
- Repeat: Do this for all three pedals. Remove the painter’s tape, and you’re done.
Piano Pedal Cleaning Do’s and Don’ts
| Do | Don’t |
|---|---|
| Use soft, clean microfiber cloths. | Use abrasive sponges or steel wool. |
| Test the polish on a tiny, hidden spot first. | Use all purpose cleaners or wood polish. |
| Carefully tape off all surrounding wood. | Spray any liquid directly onto the pedals. |
| Apply polish to the cloth, not the piano. | Forget to buff the polish off before it dries. |
| Work in a well ventilated area. | Let polish seep into the internal mechanism. |
Why Is My Piano Pedal Sticking or Squeaking?
A squeaky or sticky pedal can completely pull you out of the music. This is one of the most common issues in piano pedal maintenance for beginners. The cause is almost always one of four things:
- Debris: Dust, pet hair, and small objects get lodged in the mechanism.
- Lack of Lubrication: Metal on metal or metal on wood contact points dry out.
- Misalignment: A component in the internal pedal system (the trapwork) has shifted.
- Worn Parts: The felt, leather, or bushings are worn out.
The Easiest Fix: A Deep Clean
Before you reach for any lubricant, grab a vacuum cleaner with a hose attachment. For an upright piano, you’ll need to remove the bottom front panel. It’s usually held in place by a simple clip or latch at the top.
Once it’s off, you’ll have a clear view of the trapwork. Carefully vacuum all the dust and debris you can see around the pedal levers and rods. Often, this alone will fix a sticky piano pedal.
When and How to Lubricate Piano Pedals
This is where many people make a disastrous mistake. Do NOT, under any circumstances, use WD-40. It’s a solvent, not a long term lubricant. It will attract dust, gum up the mechanism, and can even damage wooden and felt parts. You need a specific lubricant designed for piano actions.
- Find the Friction Point: Press the noisy pedal slowly and listen carefully. Try to pinpoint exactly where the squeak is coming from. It’s often where a metal rod passes through a wooden guide or where two metal parts pivot.
- Apply Sparingly: Use a syringe applicator or a toothpick. You need only a tiny drop of lubricant directly on the friction point. Less is more.
- Work it In: Press the pedal up and down 10-20 times to work the lubricant into the joint. The squeak should disappear.
Can I Adjust My Own Piano Pedals?
The short answer is, probably not. While cleaning and light lubrication are great DIY tasks, pedal adjustment is a job for a professional. Pedal adjustment is part of a much larger process called regulation.
Regulation involves making thousands of precise adjustments to the piano’s action to ensure it performs correctly. This is something that requires specialized tools and years of training. A Registered Piano Technician (RPT), often certified by an organization like the Piano Technicians Guild, knows how to adjust for things like:
- Damper Lift: Ensuring the dampers lift evenly and at the exact right moment.
- Lost Motion: Removing any slack in the trapwork so the pedal feels responsive.
- Pedal Travel: Adjusting the height and depth of the pedal’s movement.
- Alignment: Correcting any rods that are rubbing against other parts.
- Replacing Worn Felt: The small pieces of felt that cushion the pedals can compress over time, leading to a clunky, noisy sound. A tech can replace these easily.
Troubleshooting Common Pedal Issues
| Problem | Possible Cause | Beginner Solution | When to Call a Pro |
|---|---|---|---|
| Squeaking Pedal | Dry friction point, debris. | Vacuum area, apply a tiny drop of Protek CLP to the joint. | If squeak persists or is inside the main piano action. |
| Sticky/Slow Pedal | Debris in the trapwork, worn part. | Remove bottom panel (upright) and vacuum thoroughly. | If it still sticks, or if a spring or part appears broken. |
| “Clunky” Sound | Worn felt/leather padding. | Visually inspect the felt where the pedal lever rests. | Always. Replacing these parts requires the right material and adhesive. |
| Pedal Feels Loose | Loose lyre bolts (grand), worn bushings. | Check if the lyre on a grand is wobbly. You can gently tighten the bolts. | For any internal looseness or if the pedal itself is wobbling on its pin. |
| Pedal Doesn’t Work | Disconnected rod, broken part. | Visually inspect if a wooden dowel has slipped out of place. | Immediately. This indicates a mechanical failure that needs expert repair. |
How Often Should You Maintain Pedals?
To keep pedals in good shape, here’s a recommended maintenance schedule:
| Interval | What to Do |
|---|---|
| Weekly / monthly | Wipe pedals with a dry microfiber cloth to clear dust |
| Every 3–6 months | Light polish, remove mild tarnish, buff |
| Annually | Deeper clean, inspect linkage, check for squeaks or stickiness |
| During professional servicing | Technician should check pedal action, bushings, re-lubricate, and adjust as needed |
Many piano care guides stress that piano care (including pedals) is part of regular maintenance, not just once in a while.
Also: don’t let tarnish accumulate for years. Deep corrosion is harder to remove and can permanently damage the metal surface.
Final Thoughts: Your Next Steps for Perfect Pedals
You now have a complete toolkit for basic piano pedal maintenance. You know what the pedals do, how to make them shine, and how to solve the most common noises without causing any harm.
Regular cleaning is a simple task you can do every few months. Tackling a small squeak is an easy win that will make playing more enjoyable.
Most importantly, you now know that major adjustments and repairs are part of a larger regulation process best left to a professional piano technician.
Your homework? Go take a look at your pedals this weekend. A little bit of care goes a long way.
FAQ: Piano Pedal Maintenance and Cleaning
1. How do you clean and shine brass piano pedals?
To make your pedals shine, first protect the wood around them with painter’s tape. Never spray anything directly on the pedal. Instead, put a small amount of a good brass or metal polish on a soft microfiber cloth. Rub the polish onto the pedal in small circles. Then, use a second, clean cloth to buff the pedal until it’s bright and shiny.
2. Why is my piano pedal sticking?
A sticky piano pedal is most often caused by dust, pet hair, or even a small object (like a coin or pencil) getting stuck in the pedal mechanism. On an upright piano, you can often fix this by removing the bottom front panel and carefully vacuuming out the debris from around the pedal levers.
3. Can I use WD-40 on a squeaky piano pedal?
No, you should never use WD-40 on any part of your piano. This is a very common mistake. WD-40 is a solvent, not a true lubricant. It will attract much more dust and dirt, gumming up the delicate parts and making the problem worse over time. It can also damage the felt and wood components.
4. How do I fix a squeaky piano pedal?
A squeak is just a dry friction point, usually where metal meets wood or metal touches metal. The first step is to vacuum the area thoroughly. If it still squeaks, you can get a special piano action lubricant. Use a toothpick or a small applicator to apply just one tiny drop directly to the spot that is squeaking. Press the pedal a few times to work it in.
5. Why does my piano pedal make a “clunking” sound?
That “clunk” or “thud” sound usually means a small piece of felt or leather inside the mechanism has become old, hard, or worn out. These little pieces act as cushions to stop parts from hitting each other. When they wear down, you hear the sound of wood or metal hitting. A piano technician can replace these felt pads easily.
6. How often should piano pedals be serviced?
Your entire piano, including the pedals, should be serviced by a professional piano technician at least once a year. This visit always includes a tuning, and you can ask them to also check the pedal mechanism. This check-up is called regulation, and it keeps everything working smoothly.
7. Can I adjust my own piano pedals?
While cleaning and light lubrication are fine for beginners, you should not try to adjust your pedals. Pedal adjustment is a very precise job that affects how the pedals connect to the piano’s action (the internal hammers and dampers). This is complex work that should always be left to a trained professional.