How to Fix Air Leak in Harmonica: A Complete Repair Guide
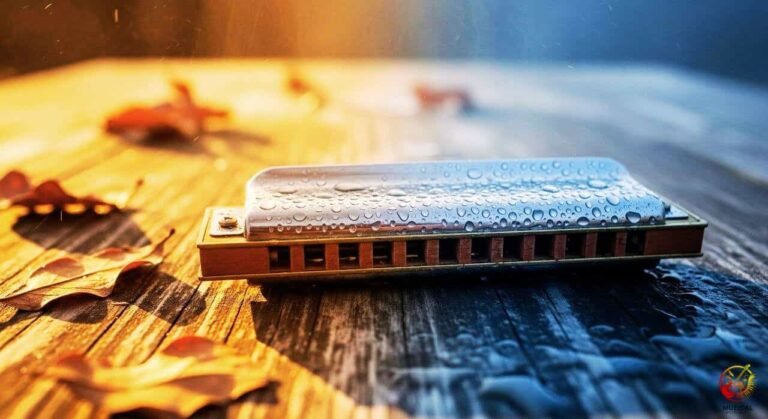
Air leaks are one of the most common problems players face, and knowing how to fix air leak in harmonica can completely change the way your instrument responds.
Air leaks make the instrument weak, unresponsive, and harder to play. When too much breath escapes through gaps in the reed plates, comb, or cover plates, you lose control of airflow and the reeds fail to vibrate properly. This isn’t just frustrating, it also shortens practice time and damages your tone.
Many players think a leaky harmonica means it’s worn out or broken beyond repair. In reality, most leaks come from simple issues like misaligned reed plates, warped combs, loose screws, or bent cover plates.
With a little knowledge and the right approach, you can restore airtightness, improve reed response, and bring your harmonica back to life.
This guide will walk you through diagnosis, step by step fixes, common mistakes, and when professional repair is the smarter choice.
Why does my harmonica have an air leak?

Air leaks happen when the harmonica isn’t fully airtight. Every harmonica, whether diatonic, chromatic, or tremolo, depends on precise airflow control. If air slips through gaps instead of driving the reeds, you end up blowing harder and getting thinner sound.
Typical causes include:
- Warped combs: Common with wooden combs (like Hohner Marine Band), which swell when exposed to moisture.
- Loose reed plates: If screws aren’t evenly tightened, tiny gaps open along the edges.
- Bent cover plates: Even a slight dent reduces the airtight seal.
- Dust or debris: Particles stuck between the reed plate and comb create uneven spacing.
For example, a wooden comb harmonica can warp slightly after absorbing moisture, creating tiny spaces between the comb and reed plates. Even a gap as small as a sheet of paper can cause airflow loss.
Pro Tip: Even new harmonicas can leak if manufacturing tolerances are off. Brands like Suzuki, Seydel, and Lee Oskar are generally better sealed, but no instrument is leak proof forever.
How do I check where the air leak is coming from?
Before you can fix anything, you need to locate the leak. Three reliable methods can help:
- Light Test: Hold the disassembled harmonica against a bright lamp. If you see thin strips of light between the reed plate and comb, that’s an air gap.
- Suction Test: Place your lips over a single hole and draw in gently. If the airflow feels loose or weak without producing full sound, a leak is likely in that section.
- Cover Plate Pressure Test: While playing, gently press on the cover plates. If tone improves instantly, the problem lies with loose or bent covers.
| Test Method | What It Detects | Tools Needed |
|---|---|---|
| Light Test | Misaligned plates, warped comb | Bright light |
| Suction Test | Weak airflow, reed response | None |
| Cover Plate Test | Loose or bent covers | Your hands |
Taking time to identify the exact source saves you from unnecessary adjustments and ensures you apply the right fix.
Can I fix air leaks in a harmonica at home?
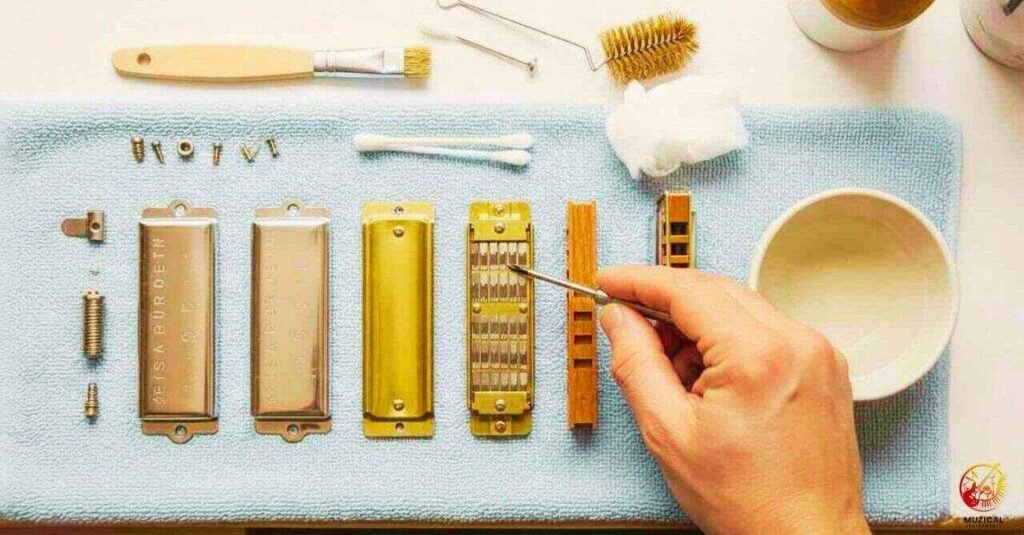
Yes, in most cases you can. Unless reeds are severely damaged, repairing leaks doesn’t require advanced luthier skills. A simple harmonica repair kit with screwdrivers, reed tools, and fine sandpaper is enough.
Here’s a practical process:
- Disassemble the harmonica: Remove the cover plates and unscrew reed plates from the comb.
- Clean each part: Use a soft brush or microfiber cloth to remove dust and buildup.
- Check for flatness: Place reed plates and comb on a flat surface (glass works best). If they rock, they’re warped.
- Flatten surfaces: Lightly sand a warped comb, or press reed plates flat.
- Reassemble carefully: Tighten screws evenly to create a balanced seal.
Expert Insight: Over tightening screws is a common beginner mistake. It can strip the threads or create uneven tension, actually worsening the leak. Aim for snug, even pressure across all screws.
How to fix air leak in harmonica by sealing reed plates
Reed plates play the biggest role in airtightness. If they aren’t sealed to the comb properly, airflow escapes before reaching the reeds.
Steps to seal reed plates:
- Inspect edges: Remove corrosion or debris. Even a thin layer of tarnish prevents a flush fit.
- Align carefully: Position reed plates so screw holes match perfectly. Misalignment equals leaks.
- Tighten in cross pattern: Like tightening lug nuts on a car wheel, alternate sides to apply even pressure.
Some players go further by adding gaskets (thin layers of teflon or paper) or a light coating of beeswax to wooden comb edges. This can dramatically improve seal and prevent future leaks.
| Method | Best For | Caution |
|---|---|---|
| Even screw pressure | All harmonicas | Avoid over-tightening |
| Beeswax coating | Wooden comb models | Needs reapplication in heat |
| Gasket sheets | Plastic/metal combs | Can slightly change spacing |
Done properly, reed plate sealing improves volume, responsiveness, and reduces unnecessary breath force.
What if the harmonica comb is warped?
The comb is the core of the harmonica. If it warps, sealing becomes impossible. This problem is most common in pearwood combs (like older Hohner Marine Band models).
Fixing a warped comb:
- Place fine sandpaper on a flat glass surface.
- Rub the comb gently in circular motions until all surfaces are even.
- Check regularly to avoid removing too much material.
If the comb is cracked or severely swollen, replacement is the best option. Companies like Hohner, Seydel, and Blue Moon Harmonicas sell replacement combs in plastic, acrylic, or metal for better stability.
Pro Tip: To prevent warping, apply a thin coat of mineral oil, shellac, or beeswax to wooden comb edges. This reduces moisture absorption without affecting tone.
How do cover plates affect air leaks?
Cover plates don’t just protect reeds, they shape resonance and airflow. If they’re bent, loose, or poorly aligned, air leaks around the edges and weakens sound.
To fix:
- Check alignment: Hold the plates against a flat surface to see if they’re bent.
- Straighten carefully: Press gently until the plate lies flat.
- Reattach evenly: Tighten screws in balance, ensuring both plates sit flush.
Some advanced players add thin sealing strips (such as adhesive felt or teflon tape) under cover plate edges for an extra layer of airtightness. While not necessary for beginners, it’s a useful trick for gigging musicians who want maximum efficiency.
Think of cover plates like the lid of a jar. If it doesn’t close evenly, nothing inside is sealed. The same applies to harmonicas.
How to fix air leak in harmonica if reeds are the problem?
Sometimes, leaks aren’t from gaps but from the reeds themselves. If reeds are misaligned, gapped too wide, or clogged with debris, air escapes without full vibration.
Steps to adjust reeds:
- Use a thin reed tool or feeler gauge to reset reed gapping (distance between reed and plate). Narrower gaps improve efficiency, while wider gaps make reeds harder to play.
- Check for dirt or corrosion. Cleaning with isopropyl alcohol and a fine brush restores function.
- For bent or cracked reeds, replacement is the only option.
Brands like Hohner and Suzuki sell reed replacement kits, but swapping reeds requires precision. If you’re unsure, a professional harmonica technician is worth the cost.
When should you seek professional harmonica repair?
DIY repairs work for small leaks, but sometimes professional repair is smarter. You should seek help when:
- The comb is cracked or severely warped.
- Reeds are broken, rusted, or need tuning.
- Screws are stripped, making reed plate sealing impossible.
- Multiple attempts haven’t solved the issue.
Professional services, like Richard Sleigh’s custom harmonica work or Blue Moon Harmonicas’ upgrades can make even budget models play better than new.
| Repair Type | DIY Possible | Professional Needed |
|---|---|---|
| Reed plate alignment | Yes | No |
| Comb flattening | Yes | No |
| Reed gapping | Yes | Optional |
| Reed replacement | Difficult | Yes |
| Cracked comb repair | No | Yes |
For inexpensive harmonicas, replacement may be more cost effective. But for higher end models like Hohner Crossover or Seydel 1847, professional repair is worth the investment.
Final Thoughts
Learning how to fix air leak in harmonica saves you money, improves playability, and keeps your music flowing. Most leaks come from reed plate misalignment, warped combs, or loose cover plates, problems you can handle with patience and simple tools. Sealing reed plates, flattening combs, and adjusting reeds all restore airflow and make your instrument feel brand new.
If the problem goes beyond surface fixes, like cracked combs or damaged reeds, professional repair is the better route. The key is regular harmonica maintenance and catching leaks early before they worsen.
Next time your harmonica feels weak or unresponsive, don’t rush to replace it. With the right knowledge, you can repair it yourself and enjoy the rewarding process of bringing life back to your instrument.
FAQ: How to Fix Air Leak in Harmonica
1. How can I tell if my harmonica has an air leak without taking it apart?
The quickest method is the “sip test.” Use your fingers to cover all the holes on the comb, then place the harmonica to your lips and gently draw air in as if sipping through a straw. A very airtight harmonica will offer a lot of resistance, allowing very little air through. If you can draw air in easily, you have a significant leak. Other telltale signs during play include a weak, breathy tone and feeling like you’re running out of breath quickly.
2. Why is my brand-new harmonica so hard to play?
It’s a common misconception that all new harmonicas are perfect out of the box. Mass-manufacturing processes can result in reed plates that aren’t perfectly flat or reed gaps set too high for the average player. These small factory imperfections are a primary cause of air leaks, making even a new instrument feel stiff and unresponsive.
3. Can you actually make a cheap harmonica play better?
Yes, absolutely! Learning to improve airtightness is the most effective way to upgrade a budget friendly harmonica. By performing the techniques in this guide, such as flat sanding the comb and reed plates and adjusting the reed gaps, you can make an inexpensive instrument play with the responsiveness and power of a much more expensive model.
4. What does “reed gapping” mean on a harmonica?
Reed gapping refers to adjusting the resting height of a reed’s tip in relation to the slot in the reed plate. This tiny space is critical for how the harp plays. A smaller gap makes the reed respond to the slightest breath, while a larger gap requires more air pressure but can produce more volume. Finding the right gap for your playing style is key to a responsive instrument.
5. Is sealing a wooden harmonica comb really necessary?
For optimal performance and longevity, yes. An unsealed wooden comb absorbs moisture from your breath, which causes it to swell, shrink, and eventually warp. This warping creates gaps between the comb and reed plates, leading to major air leaks. Sealing the comb with a non-toxic, waterproof sealant stabilizes the wood and ensures a consistent, airtight seal.
6. How does an air leak affect my ability to bend notes?
Bending notes requires precise control and pressurization of the airstream. An air leak is like a hole in a tire, it lets that pressure escape before it can do its job. This makes it extremely difficult to isolate the reed and achieve the specific airflow needed to initiate and sustain a clean, accurate bend. Fixing leaks provides the solid foundation needed for advanced techniques.
7. What are the absolute essential tools to start fixing my harmonica?
You don’t need a professional workshop to get started. The essentials are: a set of jeweler’s screwdrivers for disassembly, a guaranteed flat surface (like a small ceramic tile or piece of glass), and some fine-grit wet/dry sandpaper (600-grit is a good start) for flattening. For adjusting reeds, you can begin with something as simple as a toothpick or a thin paper shim.
8. Can regular cleaning help prevent harmonica air leaks?
While regular harmonica maintenance won’t fix a warped comb, it can prevent problems. Debris from saliva and the environment can get lodged under a reed or between the reed plate and comb, disrupting the seal. By tapping out moisture after each use and performing occasional gentle cleanings, you keep the components clear and prevent minor blockages from creating leak-like symptoms.